Unleash a world of spooky creativity with the Tricks and Treats Bundle by Stampin’ Up! This Halloween, gear up to craft like never before with these versatile 15 dies that make every project a breeze. From the jovial Frankenstein to the mystical vampire, adorable candy corn, and even a spooky ghost, these dies have got it all covered. Dreaming of a haunted house setup or seeking the perfect labels for your stamp sentiments? Look no further!
But that’s not all – this Bundle is your passport to crafting mesmerizing treat packaging too! Feel the freedom to use any paper and stamps of your choice to personalize your die cuts, giving a special touch to your Halloween crafts. Whether you are customizing creations to resonate with a person’s vibes or marking a special occasion, these dies are here to sprinkle haunted fun all season long!
How To Make This Card
Project Skill Level: Worker Bee
Worker Bee projects are designed for the crafter who has a bit more time and enjoys creating a handmade card that features a technique or tool. In many cases, a Stampin’ Cut & Emboss Machine is required for die-cutting and/or embossing.
Cardstock Measurements:
- Basic Black Cardstock: 5-1/2″ x 8-1/2″, scored at 4-1/4″
- Basic White Cardstock: 4″ x 5-1/4″
- O Holy Night Designer Paper: 3-1/2″ x 4-1/2″
- Crushed Curry Cardstock: 3″ x 3″ (for punching)
- Smoky Slate Cardstock: 4″ x 4″ (for die-cutting)


Grab your Free copy
Get 5 Bee-utiful Exclusive
Card Sketches in Your Inbox
Join our newsletter and receive a honey of a package of five quick & simple cards guaranteed to make your creativity buzz! Sign up now and let the goodness flow straight to your inbox!
Step-by-Step Instructions:
- Fold the Basic Black cardstock in half at the scoreline. Open the cardstock back up and run the front only of the card through the Stampin’ Cut & Emboss Machine using the Distressed Tile 3D Embossing Folder, using the fold line as a guide.
- After embossing, refold the card and burnish well with your Bone Folder. Making sure your White Craft ink pad is well inked, use a sponge dauber to sponge white ink in random areas on the front of the cardstock to spotlight. Carefully adhere the White cardstock mat inside the card and set aside to dry.
- Using the Crushed Curry cardstock, punch out the 2-3/8″ circle using the Circle Punch. Stamp the bats image in the upper right corner using Black Memento ink. Adhere to the O Holy Night paper as shown in the sample.
- Using the Black Memento ink pad, stamp the bats in the upper right corner of the O Holy Night paper and the tombstone images below the Crushed Curry circle. Adhere the paper to the card base.
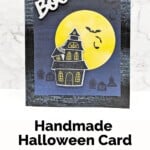
- Stamp the haunted house image onto the Smoky Slate cardstock using Black Memento ink. Color in the windows using the Dark Daffodil Delight Blend. Run the Smoky Slate cardstock through the Stampin’ Cut & Emboss Machine and cut out the house and the “boo” using the Tricks & Treats dies that come in the Bundle.
- Adhere the “boo” in the upper left corner of the O Holy Night paper using Stampin’ Dimensionals.
- To finish, adhere the haunted house so that it overlaps the Crushed Curry circle using Stampin’ Dimensionals.
A Tip from Barb
This card is the perfect representation of a “Worker Bee” card. The Stampin’ Cut & Emboss Machine makes easy work of all the pieces using a variety of dies from the Tricks & Treats Bundle, the 3D Embossing Folder and Punch are also easy to use, and the White Craft ink adds a touch of depth to the embossed background of the card! Who wouldn’t love to receive this fun but spooky Halloween card? ?
Thanks so much for stopping by today! If you’d like more detailed directions on how to make this card, feel free to email me. Be sure to give this card sketch a try and mail it to a friend who loves Halloween! It’s so fun to make a card, but it’s even more fun to send! #makeacardsendacard

Don’t forget to pin this for later!