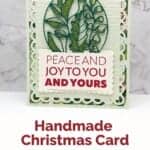
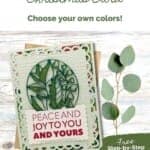
Make this elegant Joy To You Christmas card using the Joy to You stamp set and Handcrafted Elements Dies by Stampin’ Up! Good tidings and great joy come in small packages—especially when they’re crafted with love. Whether you’re an experienced paper crafter or new to the hobby, this blog post will guide you through creating a heartwarming Good Tidings Card that spreads cheer and love.

How To Make This Card
Project Skill Level: Queen Bee
Queen Bee projects are designed for experienced papercrafters. In most cases, these cards involve multiple techniques and products, including a Stampin’ Cut & Emboss Machine for die-cutting and/or embossing. These projects are often more involved – but the results are worth it!
Cardstock Measurements:
- Soft Sea Foam Cardstock: 5-1/2” x 8-1/2”, scored at 4-1/4”
- Very Vanilla Cardstock: 4” x 5-1/4”
- Soft Sea Foam Cardstock: 4-1/4” x 5-1/2”
- Joy of Christmas Paper, Pattern 1: 4” x 5-1/4”
- Joy of Christmas Paper, Pattern 2: 3” x 3-3/4” (for die-cutting)
- Joy of Christmas Paper, Pattern 3: 3” x 3-3/4” (for die-cutting)
- Very Vanilla Cardstock: 2” x 3-1/2” (for die-cutting)


Grab your Free copy
Get 5 Bee-utiful Exclusive
Card Sketches in Your Inbox
Join our newsletter and receive a honey of a package of five quick & simple cards guaranteed to make your creativity buzz! Sign up now and let the goodness flow straight to your inbox!
Step-by-Step Instructions:
- Fold the Soft Sea Foam Cardstock in half to create your base card.
- Adhere the 4” x 5-1/4” piece of Very Vanilla cardstock inside your card.
- Adhere the Joy of Christmas Paper (pattern 1) onto the front of the card.
- Using the 4-1/4” x 5-1/2” piece of Soft Sea Foam cardstock, run through the Cut & Emboss Machine and emboss using the Exposed Brick 3D Embossing Folder. Run back through the Machine and cut out using the 3-7/8” x 5-1/8” die from the Scalloped Contours dies. Adhere to the front of the card using adhesive.
- Using the 2” x 3-1/2” piece of Very Vanilla cardstock, stamp the sentiment in center of cardstock using Real Red ink. Run the cardstock through the Cut & Emboss Machine using the 1-3/4” x 3-1/8” die from the Scalloped Contours dies. Set aside.
- Run the Joy of Christmas Paper (Pattern 2) through the Cut & Emboss Machine using the outline die from the Handcrafted Dies. Run the Joy of Christmas Paper (Pattern 3) through the Machine and die-cut using the coordinating background die. Adhere the background die (Paper Pattern 3) to the back of the outline die-cut (Paper Pattern 2.)
- Slip the bottom of the ornament into the top “slit” of the sentiment die-cut (Step #6). Secure the 2 together by using Mini Stampin’ Dimensionals on the back side of the Vanilla cardstock. Add more Mini Stampin’ Dimensionals to the larger areas of the ornament (where they won’t be seen and the sentiment die-cut. Adhere to front of card to finish.
A Tip from Barb
This is a true Queen Bee card, not just because of all the die-cuts used, but also because of the design of the sentiment label. No card is truly difficult when you have easy-to-use dies and the Stampin’ Cut & Emboss Machine, but this one will take some extra time. I urge you to check it out, though, because the end result is absolutely stunning in person!
Thanks so much for stopping by today! If you’d like more detailed directions on how to make this card, feel free to email me. Be sure to give this card sketch idea a try and mail it to a friend who is celebrating something! It’s so fun to make a card, but it’s even more fun to send! #makeacardsendacard

Don’t forget to pin this for later!