These 3 cards using the Jolly Delivery Bundle by Stampin’ Up!® are the kind of project that makes you feel like you’re wrapping up holiday cheer in paper form. This Step It Up Stamping tutorial will take you through three different versions of the same design, showing you how to start simple and then add more details until you’ve created a card that looks extra special. It’s the perfect way to make handmade Christmas cards without stress or overwhelm.

The Jolly Delivery Bundle is pure fun — featuring adorable animals like bears, dogs, and cats, along with postage-themed images and cheerful sentiments. It’s a set that captures the joy of sending and receiving holiday mail, which makes it perfect for cardmaking. The coordinating dies even let you create 3D treat packages, so you can extend the festive fun beyond cards and into gift-giving.
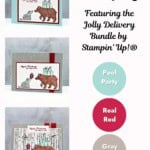
For these projects, I used a playful holiday color palette of pool party, real red, and gray granite. These colors balance traditional Christmas cheer with a fresh, modern twist that works beautifully for handmade cards.

The first version, our busy bee card, keeps things simple with stamped images of the bear and pup alongside a few gift boxes. Colored in soft pool party and warm brown tones, it’s a quick design that you can make in minutes but still looks adorable. A real red sentiment adds the perfect festive pop.
For the worker bee card, we stepped it up by adding a textured gray granite background with a ribbon accent. The added layers give the design more depth and polish, while still keeping the playful feel of the stamped critters. The dog now balances a red present on his nose — a little extra detail that brings a smile to anyone who sees it.
Want the Tutorial? Get It at a Discount!
The tutorials for my Step It Up Stamping Projects usually sell for $10, but you can
purchase it for a limited time for $5. Use the button below for this special offer!
Finally, the queen bee card takes everything to the next level. The same bear and dog are here, but now they’re placed in front of a birch forest background, using the Nests of Winter Designer Series Paper, with extra die-cut details. The fun-fold design feels cozy and festive, yet still easy to make when you break it down step by step. This card is perfect for when you want to wow someone special with your handmade Christmas greeting.
What I love about step it up stamping is that each version is beautiful in its own way. Whether you stop at the simple busy bee card or go all the way to the queen bee showstopper, you’ll feel proud of what you’ve made. And whoever receives it will feel the love and joy you tucked inside. With the jolly delivery bundle, it’s never been easier to create cards that deliver cheer during the holiday season.
WATCH THE VIDEO
Supplies You’ll Need
These are the basic supplies you’ll need for each of the 3 cards. You can find the complete detailed supply list at the bottom of this post.
The Busy Bee Card
Quick & Easy when you want to fill up someone’s mailbox with sunshine & love. Perfect for the Beginner Cardmaker.

The Worker Bee Card
When you have a bit more time and supplies to put into a very special project for that special someone. Perfect for the Confident Cardmaker.

The Queen Bee Card
When you have the time and supplies to take your project right over the top. Give yourself bragging rights – perfect for the Experienced Cardmaker!

Love these projects? Unlock exclusive weekly crafting tutorials delivered straight to your inbox! Sign up now and start creating with us—it’s free!
Thanks for stopping by for today’s Step It Up Stamping card tutorial! My goal is to help you make quick & easy greeting cards for all occasions. If you’d like more detailed directions on how to make these cards, feel free to email me.
I hope you’ll join me again for more card-making ideas! I’d love to see what you have created so mention me @bzbstamper, tag me @bzbstamper or comment below where I can see your creations!