These 3 Cards Using the Branching Out Bundle are a perfect example of how you can create beautiful, nature-inspired cards in just minutes — no artistic background required! This bundle captures the rustic charm of the outdoors with its delicate pine branches, cones, and layered details. Thanks to this being a Stampin’ Up!® Two-Step Stampin’ stamp set, you can quickly build rich, dimensional images that look hand-painted without ever picking up a brush.

This set was made for anyone who loves the beauty of simplicity. The graceful pine needles and cozy earthy tones make it ideal for masculine cards, birthday greetings, or any project that needs a warm, organic touch. Whether you’re new to stamping or looking for an easy way to create a layered look, this bundle gives you elegant results with minimal effort.
The color palette for today’s cards — Crumb Cake, Garden Green, and Early Espresso — brings a timeless, woodsy feel that works for any season. Crumb Cake provides a soft neutral base, Garden Green adds vibrant freshness, and Early Espresso grounds the design with rich depth. Together, they make your stamped pine branches look lush and realistic.

Now let’s walk through three simple cards that show how you can Step It Up Stamping — from beginner-friendly to more advanced designs.
Busy Bee Card
If you’re just starting out, this first card is perfect for you! Using only stamps, ink, and paper, it shows off the magic of Two-Step Stampin’®. Start by stamping the delicate pine branch image in Early Espresso for crisp detail, then layer on the pine needles using Garden Green and Soft Sea Foam (or stamp off for a lighter shade). Finally, add the pinecones in a warm Pecan Pie or similar brown ink to bring your stamping to life.
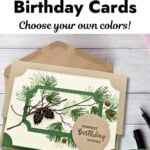
A simple sentiment in the bottom corner – “Happiest Birthday Wishes” – completes the design. You’ll be amazed at how the layering gives your stamped images realistic texture and movement, all in under ten minutes.
Worker Bee Card
Ready to step it up a little? The second card takes the same stamped image but adds extra layers for more visual interest. After stamping the design, cut out a smaller rectangle from the center of your card front and mount it on coordinating Garden Green cardstock. This creates a “spotlight” effect that draws the eye to your detailed stamping.
Add a Crumb Cake circle for your sentiment to balance the layout, then embellish with a few Streaked Dots embellishments for a touch of shimmer. This simple layering technique adds polish without extra effort — perfect for when you want a handmade look that feels professionally finished.
Want the Tutorial? Get It at a Discount!
The tutorials for my Step It Up Stamping Projects usually sell for $10, but you can
purchase it for a limited time for $5. Use the button below for this special offer!
Queen Bee Card
For the final “stepped-up” version, we’re adding die-cut details and a few special touches to create a special Gift Card Holder. The Branching Out Dies make it easy to cut stitched rectangles and elegant frames that layer beautifully. Use your dies to frame your stamped design, then add texture with linen thread, metallic pinecone accents, or additional die-cut branches.
The extra layers and details take this design from “beautiful” to “wow” while still keeping it quick and doable. The tone-on-tone background in Crumb Cake keeps everything cohesive, and those tiny metallic details catch the light perfectly.
This card is ideal for birthdays, but it’s versatile enough for any occasion where you want to send a card that feels both heartfelt and timeless.
Creating with the Branching Out Bundle shows how quickly you can go from beginner to confident stamper. Each project builds on the last, helping you explore layering, framing, and embellishing at your own pace.
If you love these designs, be sure to watch the full Step It Up Stamping video tutorial, where I walk through each version step-by-step and share extra tips for Two-Step Stampin’® success.
WATCH THE VIDEO
Supplies You’ll Need
These are the basic supplies you’ll need for each of the 3 cards. You can find the complete detailed supply list at the bottom of this post.
The Busy Bee Card
Quick & Easy when you want to fill up someone’s mailbox with sunshine & love. Perfect for the Beginner Cardmaker.

Love these projects? Unlock exclusive weekly crafting tutorials delivered straight to your inbox! Sign up now and start creating with us—it’s free!
The Worker Bee Card
When you have a bit more time and supplies to put into a very special project for that special someone. Perfect for the Confident Cardmaker.

The Queen Bee Card
When you have the time and supplies to take your project right over the top. Give yourself bragging rights – this Gift Card Holder is perfect for the Experienced Cardmaker!

Thanks for stopping by for today’s Step It Up Stamping card tutorial! My goal is to help you make quick & easy greeting cards for all occasions. If you’d like more detailed directions on how to make these cards, feel free to email me.
I hope you’ll join me again for more card-making ideas! I’d love to see what you have created so mention me @bzbstamper, tag me @bzbstamper or comment below where I can see your creations!