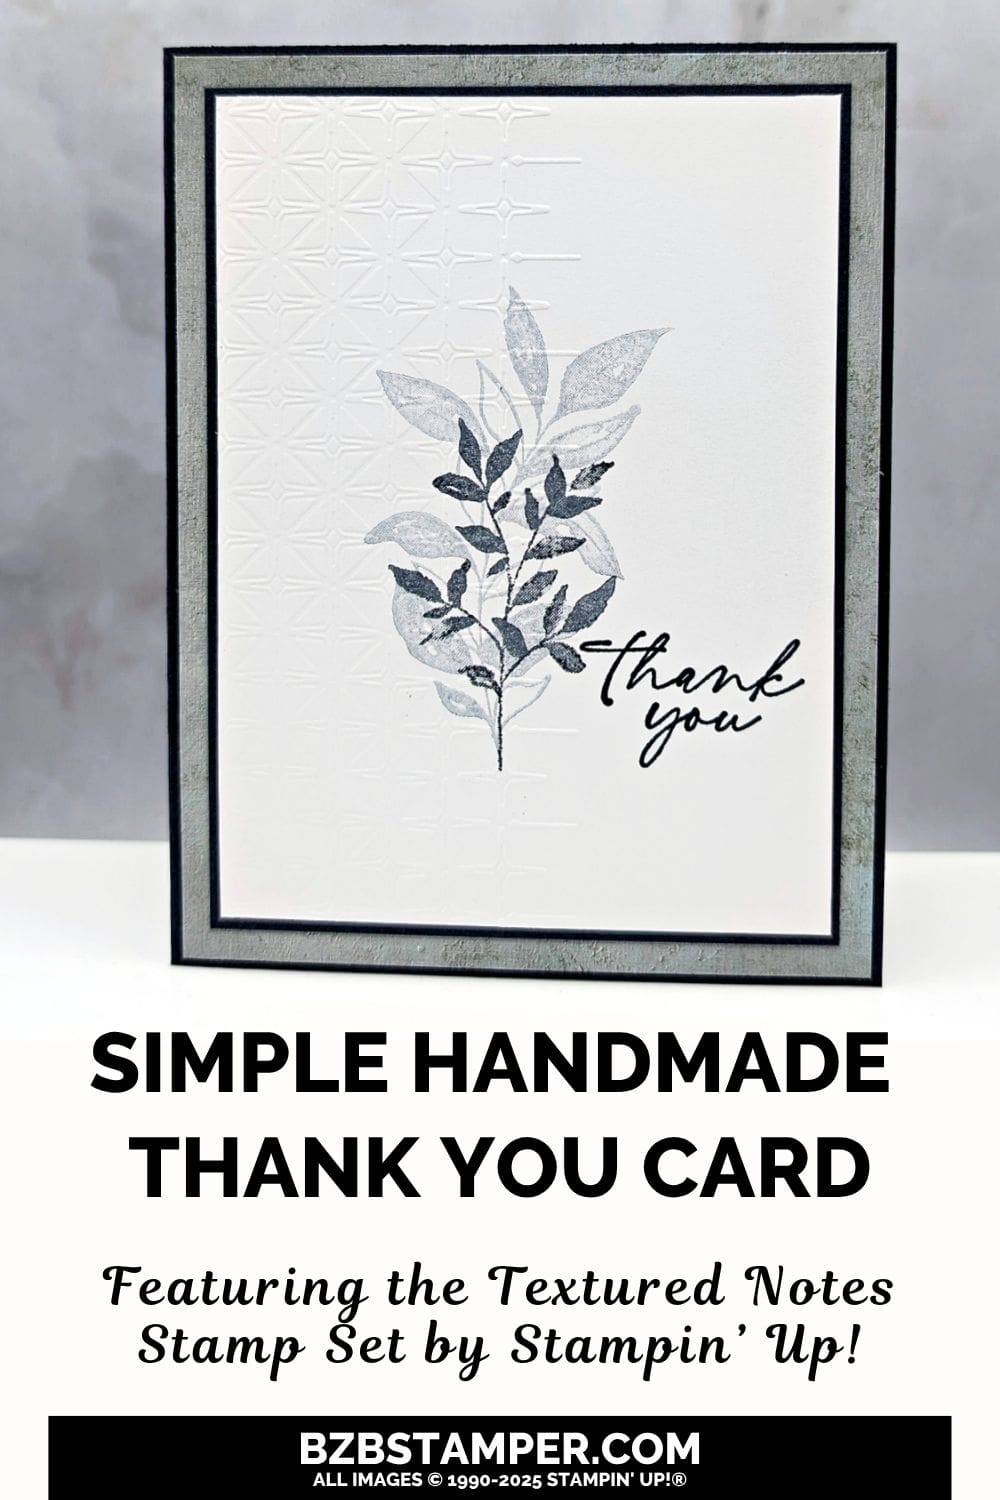
Create a beautiful Thank You Card with the Textured Notes Stamp Set and fall in love with the art of simple sophistication! If you’re anything like me, sometimes you just need a clean, elegant card that you can whip up in minutes but still looks like you spent hours on it. Today’s project is the perfect example: a soft, textured background, a layered botanical image, and a graceful thank you sentiment, all working together to create a heartfelt card that’s easy to mail and beautiful to give.
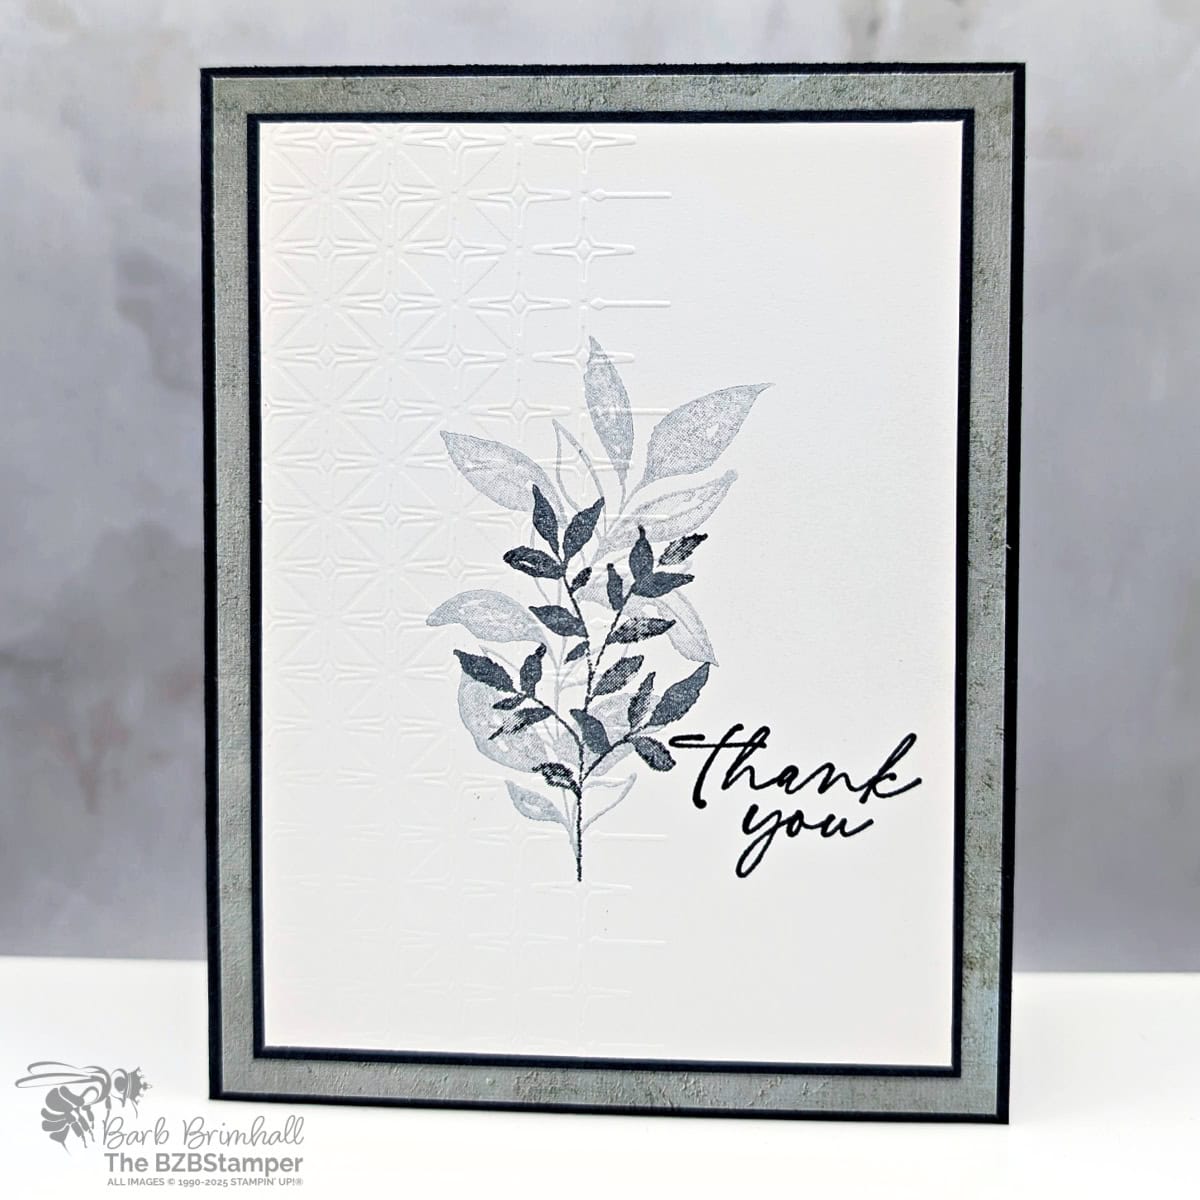
Let’s talk about the Textured Notes Stamp Set for a minute. It’s one of those sets that feels so effortless to use! The botanical images layer together like magic, and the sweet, flowing script of the sentiments matches the organic style perfectly. For this project, I used two of the leafy images, stamping them in soft neutral tones to create a gentle focal point.
To add subtle texture without overwhelming the design, I turned to the Glass & Gardens Embossing Folders. This card uses the folder with the square and diamond pattern—and it’s perfect for adding just a hint of background interest. I embossed only the left side of the Basic White panel, letting the design fade into the clean white space. It’s a simple trick, but it adds so much dimension and elegance without making the card feel busy.
Once the embossing was done, I stamped my botanical images slightly overlapping the textured area. The soft layering effect adds depth and a feeling of softness that’s just gorgeous. I finished with the “thank you” sentiment in a deep blue ink for a bit of contrast, and layered everything onto a piece of subtle patterned paper from the Beautiful Gallery Designer Paper pack for just a hint of frame and color.
This card came together so quickly, but it feels polished and ready for any occasion. I love designs like this that let the recipient feel how much you appreciate them without needing a lot of extra embellishments or supplies. Plus, the clean and simple layout makes it easy to mass-produce if you want to build up your thank you card stash!
If you’re looking for a timeless, easy-to-make card idea that’s both stylish and sincere, definitely give this project a try. The Textured Notes Stamp Set and Glass & Gardens Embossing Folders are a winning combination for cards you’ll be proud to send.
How To Make This Card
Project Skill Level: Worker Bee
Worker Bee projects are designed for the crafter who has a bit more time and enjoys creating a handmade card that features a technique or tool. In many cases, a Stampin’ Cut & Emboss Machine is required for die-cutting and/or embossing.
Cardstock Measurements:
- Secret Sea Cardstock: 5-1/2″ x 8-1/2″, scored at 4-1/4″
- Basic White Cardstock: 4″ x 5-1/4″
- Beautiful Gallery Designer Paper (Cloud Cover): 4-1/8″ x 5-3/8″
- Secret Sea Cardstock: 3-3/4″ x 5″
- Basic White Cardstock: 3-5/8″ x 4-7/8″


Grab your Free copy
Get 5 Bee-utiful Exclusive
Card Sketches in Your Inbox
Join our newsletter and receive a honey of a package of five quick & simple cards guaranteed to make your creativity buzz! Sign up now and let the goodness flow straight to your inbox!
Step-by-Step Instructions:
- Fold the Secret Sea cardstock in half at the score line to create your card base.
- Adhere the 4″ x 5-1/4″ piece of Basic White cardstock inside the card.
- Adhere the Beautiful Gallery Cloud Cover paper to the front of the card.
- Ink up the large leaf using Secret Sea ink and stamp off 4 times on your scratch paper; stamp onto the center of the 3-5/8″ x 4-7/8″ piece of Basic White cardstock. Ink up the small leaf using the Secret Sea ink pad and stamp off 2 times and stamp over the large leaf image.
- Ink up the sentiment using the Secret Sea ink pad and stamp to the right of the leaf images.
- Run the Basic White cardstock through the Cut & Emboss Machine and emboss the left side using the Glass and Gardens Embossing Folders. (I used the square/diamond pattern.)
- Adhere the Basic White cardstock to the 3-3/4″ x 5″ Secret Sea Cardstock and then to the front of the card to finish.
I appreciate you dropping by! My mission is to inspire you with card tutorials that are as fun to make as they are to give. If you’re curious about the specifics of crafting today’s design, just send me an email. Want more papercrafting ideas? Join my Facebook Community today.

Don’t forget to pin this for later!
