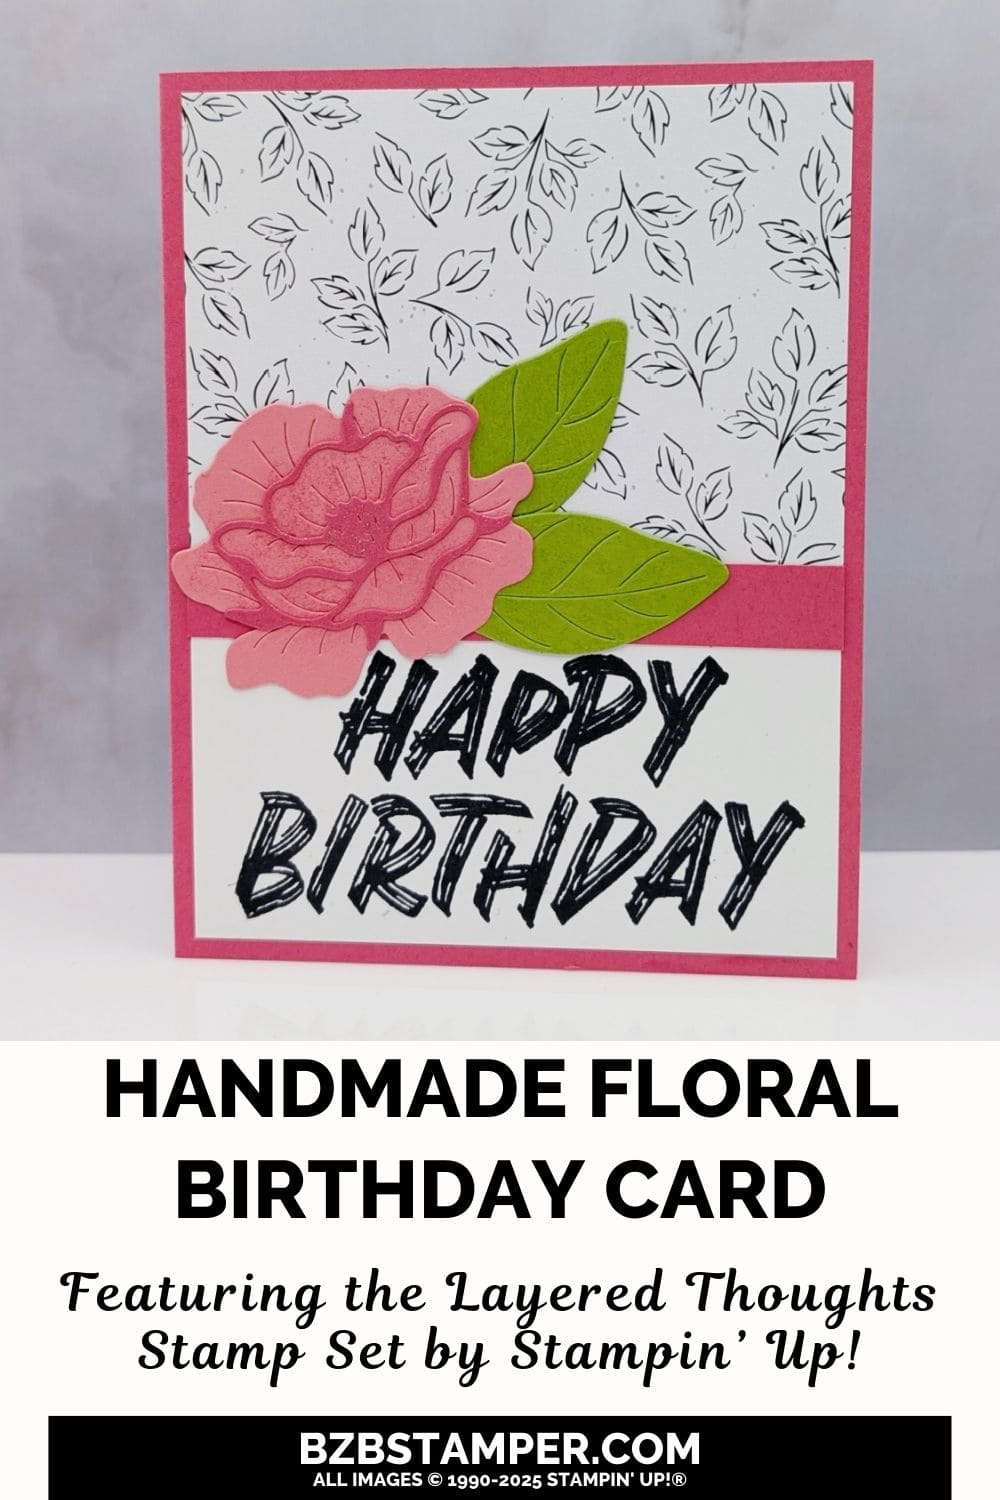
If you’ve ever wished for a card that’s both sweet and striking, this Easy Floral Birthday Card Using Layered Thoughts might be your new favorite go-to. With soft layered petals, bold sentiment, and just the right pop of color, it’s one of those cards that looks like it took ages—but comes together in a flash.
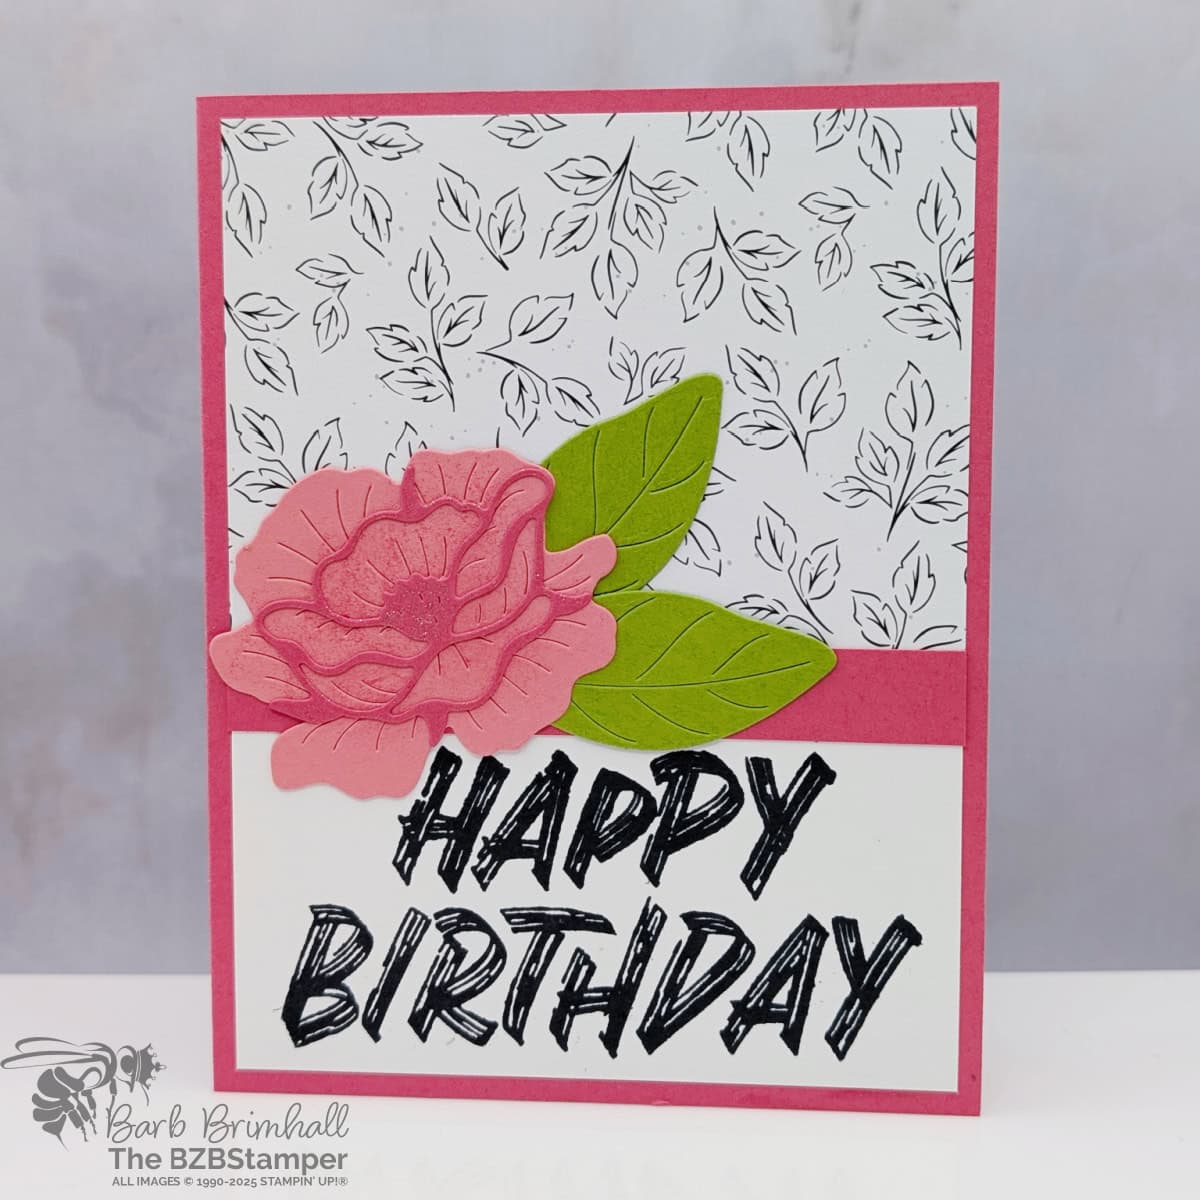
The real magic starts with the Layered Thoughts Stamp Set. That bold “Happy Birthday” sentiment brings instant energy to your card without needing a lot of extra embellishments. It’s the kind of big, brushstroke-style lettering that makes your message clear and confident, which is exactly what a birthday greeting should be.
For the background, I used a black & white leafy print from the Lovely Garden Designer Series Paper—just enough pattern to add interest without overwhelming the focal point. I love how it plays so well with the simple cardstock layers and really lets that flower shine.
Speaking of the flower—this card features one gorgeous bloom made using the Pretty Florals Dies, layered in Strawberry Slush and Flirty Flamingo cardstock. It’s soft, dimensional, and the perfect contrast to that bold sentiment. A couple of Granny Apple Green leaves tucked behind it bring a fresh, springy vibe that ties everything together beautifully.
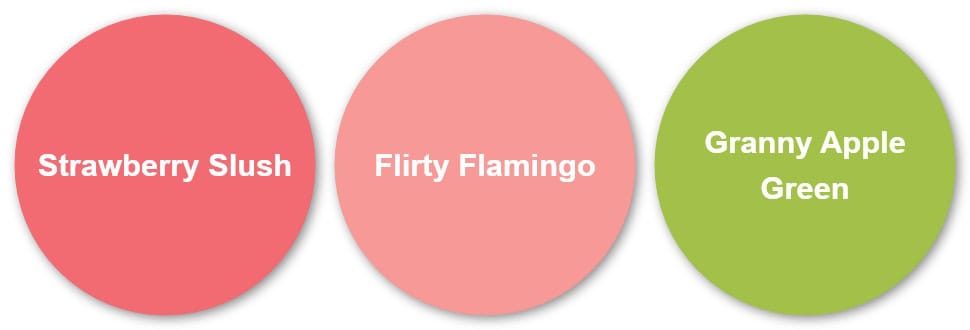
Stampin’ Up! makes coordination a breeze, which means you can spend more time having fun and less time second-guessing your choices. Everything just works together. If you’d prefer something softer, make sure you check out my Color Combination Library for more inspiration.
And the best part? It’s easy. Really! This is a beginner-friendly card that only looks like a fancy floral masterpiece. You don’t need complicated techniques—just stamps, paper, dies, and a little bit of adhesive. The layout is flexible, so you could swap in different florals, sentiments, or colors depending on what you have on hand.
So if you’re looking to create a birthday card that feels both heartfelt and happy, this is a great place to start. Bright, beautiful, and made with love—what more could you ask for?
How To Make This Card
Project Skill Level: Worker Bee
Worker Bee projects are designed for the crafter who has a bit more time and enjoys creating a handmade card that features a technique or tool. In many cases, a Stampin’ Cut & Emboss Machine is required for die-cutting and/or embossing.
Cardstock Measurements:
- Strawberry Slush Cardstock: 5-1/2″ x 8-1/2″, scored at 4-1/4″
- Basic White Cardstock: 4″ x 5-1/4″
- Lovely Garden Designer Paper: 3″ x 4″
- Basic White Cardstock: 2-1/4″ x 4″
- Strawberry Slush Cardstock: 1/2″ x 4″
- Flirty Flamingo Cardstock: 2-1/2″ x 2-1/2″ (for die-cutting)
- Strawberry Slush Cardstock: 2-1/2″ x 2-1/2″ (for die-cutting)
- Granny Apple Green Cardstock: 2″ x 2-3/4″ (for die-cutting)


Grab your Free copy
Get 5 Bee-utiful Exclusive
Card Sketches in Your Inbox
Join our newsletter and receive a honey of a package of five quick & simple cards guaranteed to make your creativity buzz! Sign up now and let the goodness flow straight to your inbox!
Step-by-Step Instructions:
- Fold the Strawberry Slush cardstock in half at the score line to create your card base.
- Adhere the 4″ x 5-1/4″ Basic White cardstock to the inside of the card.
- Adhere the Lovely Garden paper to the top of the card front, leaving a 1/8″ border around the top and sides.
- Stamp the sentiment onto the 2-1/4″ x 4″ Basic White cardstock using Black Memento ink. Adhere to the bottom of the card front, leaving a 1/8″ border at the bottom.
- Adhere the 1/2″ strip of Strawberry Slush cardstock to the center of the card to hide the seam where the Lovely Garden and Basic White cardstock match up.
- Run the Flirty Flamingo cardstock through the Stampin’ Cut & Emboss Machine and die-cut the large flower from the Pretty Florals Dies. Run the 2-1/2″ scrap of Strawberry Slush cardstock through the Cut & Emboss Machine and die-cut the coordinating outline of the previous Flirty Flamingo die-cut flower. Adhere to the Flirty Flamingo flower using small dots of adhesive. Set aside to dry.
- Run the Granny Apple Green cardstock through the Cut & Emboss Machine and die-cut 2 of the large leaves. Adhere both leaves to the back of the Flirty Flamingo flower using adhesive.
- Adhere the flower to the left side of the card, over the Strawberry Slush strip as shown in the sample.
- To finish, add Wink of Stella to the flower as desired. (I added just to the Strawberry Slush die-cut floral outline.)
A Tip from Barb
If you struggle with the small dots of glue on Step #6, and you have a Silicone Craft Mat, place a small amount of glue onto the Silicone Craft Mat, pick some up with a sponge or paper towel, and ‘dab’ the glue onto the back of the die-cut to apply a very thin layer of glue.
I appreciate you dropping by! My mission is to inspire you with card tutorials that are as fun to make as they are to give. If you’re curious about the specifics of crafting today’s design, just send me an email. Want more papercrafting ideas? Join my Facebook Community today.

Don’t forget to pin this for later!
