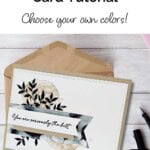
Create a Botanical Card with the Textured Notes Bundle and bring an artistic, organic feel to your next handmade card! If you love layering textures, blending nature-inspired elements, and adding sophisticated detail with minimal effort, you are going to adore this simple project.

Today, I’m sharing a beautiful card that combines the gorgeous woven and leafy textures from the Textured Notes Stamp Set with a dramatic background using a strip of the Beautiful Gallery Designer Paper.
Let’s talk about why I love the Textured Notes Bundle so much. First, the stamps themselves have an incredible amount of detail—the kind of detail that makes you look like an artist with just one press of a stamp. Then you add in the Textured Notes Dies, which have beautiful bordered rectangles that elevate even the simplest layouts. When you combine these elements with the moody, elegant look of the Beautiful Gallery Designer Paper, you get a card that’s effortlessly stylish and perfect for so many occasions.
For this project, I started with a neutral Crumb Cake card base and layered a piece of Basic White cardstock that I had die-cut using one of the detailed rectangles from the Textured Notes Dies. That die-cut border? It adds just the right touch of sophistication without any extra effort. I then stamped the woven circle image in a soft neutral ink and layered the bold leafy image right over it in our new Secret Sea In-Color for contrast.
To add even more visual interest, I cut a banner strip from the Beautiful Gallery Designer Paper. The moody mix of brushstrokes and soft colors in this paper brought just the right amount of drama to the design. I topped it off with a simple sentiment, accented it with a few embellishments, and—voila!—a heartfelt card ready to send to someone special.
What I love about this card is that it’s incredibly versatile. You can swap out the sentiment to fit birthdays, congratulations, thinking of you—whatever you need! Plus, the Textured Notes Bundle makes it easy to create cards that feel warm, natural, and personal without being too fussy. And if you ever feel stuck, just reach for that Beautiful Gallery Designer Paper—those stunning backgrounds practically do the work for you.
If you’re looking for a way to bring a fresh, artistic vibe to your handmade cards, the Textured Notes Bundle (paired with the Beautiful Gallery papers) is a total must-have. Happy crafting, friend!
How To Make This Card
Project Skill Level: Worker Bee
Worker Bee projects are designed for the crafter who has a bit more time and enjoys creating a handmade card that features a technique or tool. In many cases, a Stampin’ Cut & Emboss Machine is required for die-cutting and/or embossing.
Cardstock Measurements:
- Crumb Cake Cardstock: 5-1/2″ x 8-1/2″, scored at 4-1/4″
- Basic White Cardstock: 4″ x 5-1/4″
- Basic White Cardstock: 4-1/4″ x 5-1/2″ (for die-cutting)
- Beautiful Gallery Designer Paper: 1-1/2″ x 4″
- Basic White Cardstock: 3/4″ x 3-1/2″
- Crumb Cake Cardstock: 1/2″ x 3″


Grab your Free copy
Get 5 Bee-utiful Exclusive
Card Sketches in Your Inbox
Join our newsletter and receive a honey of a package of five quick & simple cards guaranteed to make your creativity buzz! Sign up now and let the goodness flow straight to your inbox!
Step-by-Step Instructions:
- Fold the Crumb Cake cardstock in half to create your card base.
- Adhere the 4″ x 5-1/4″ piece of Basic White cardstock inside the card.
- Run the 4-1/4″ x 5-1/2″ piece of Basic White cardstock through the Stampin’ Cut & Emboss Machine using the 3-7/8″ x 5-1/8″ Textured Notes Die from the Bundle.
- Using the Crumb Cake ink pad, stamp the round “basket weave” stamp on the upper left corner. Reink stamp and stamp again down and to the right of the previous image.
- Using the Secret Sea ink pad, stamp the floral image 3-4 times around the circle stamp as desired. Tip: see sample for placement.
- Using scissors, “banner notch” the right side only of Beautiful Gallery Designer Paper, the 3/4″ strip of Basic White cardstock and the 1/2″ strip of Crumb Cake cardstock.
- Adhere the strip of Beautiful Gallery Designer Paper to the left center of the card as shown in the sample.
- Stamp the sentiment onto the Basic Whit cardstock using Secret Sea ink. Adhere to the 1/2″ strip of Crumb Cake cardstock as shown in the sample. Adhere to the Beautiful Gallery paper using Stampin’ Dimensionals.
- To finish, add 2-3 of the Neutral Matte Dots to finish.
A Tip from Barb
This is the perfect card sketch for whenever you have scraps of some pretty paper and cardstock you’d like to use! This sketch will work for almost any set of stamps and if you don’t have a Stampin’ Cut & Emboss Machine, no worries. Just got the white mat to 4″ x 5-1/4″ and you’ll be good to go!
I appreciate you dropping by! My mission is to inspire you with card tutorials that are as fun to make as they are to give. If you’re curious about the specifics of crafting today’s design, just send me an email. Want more papercrafting ideas? Join my Facebook Community today.

Don’t forget to pin this for later!